
Adding A Checkered Accent Wall Tutorial
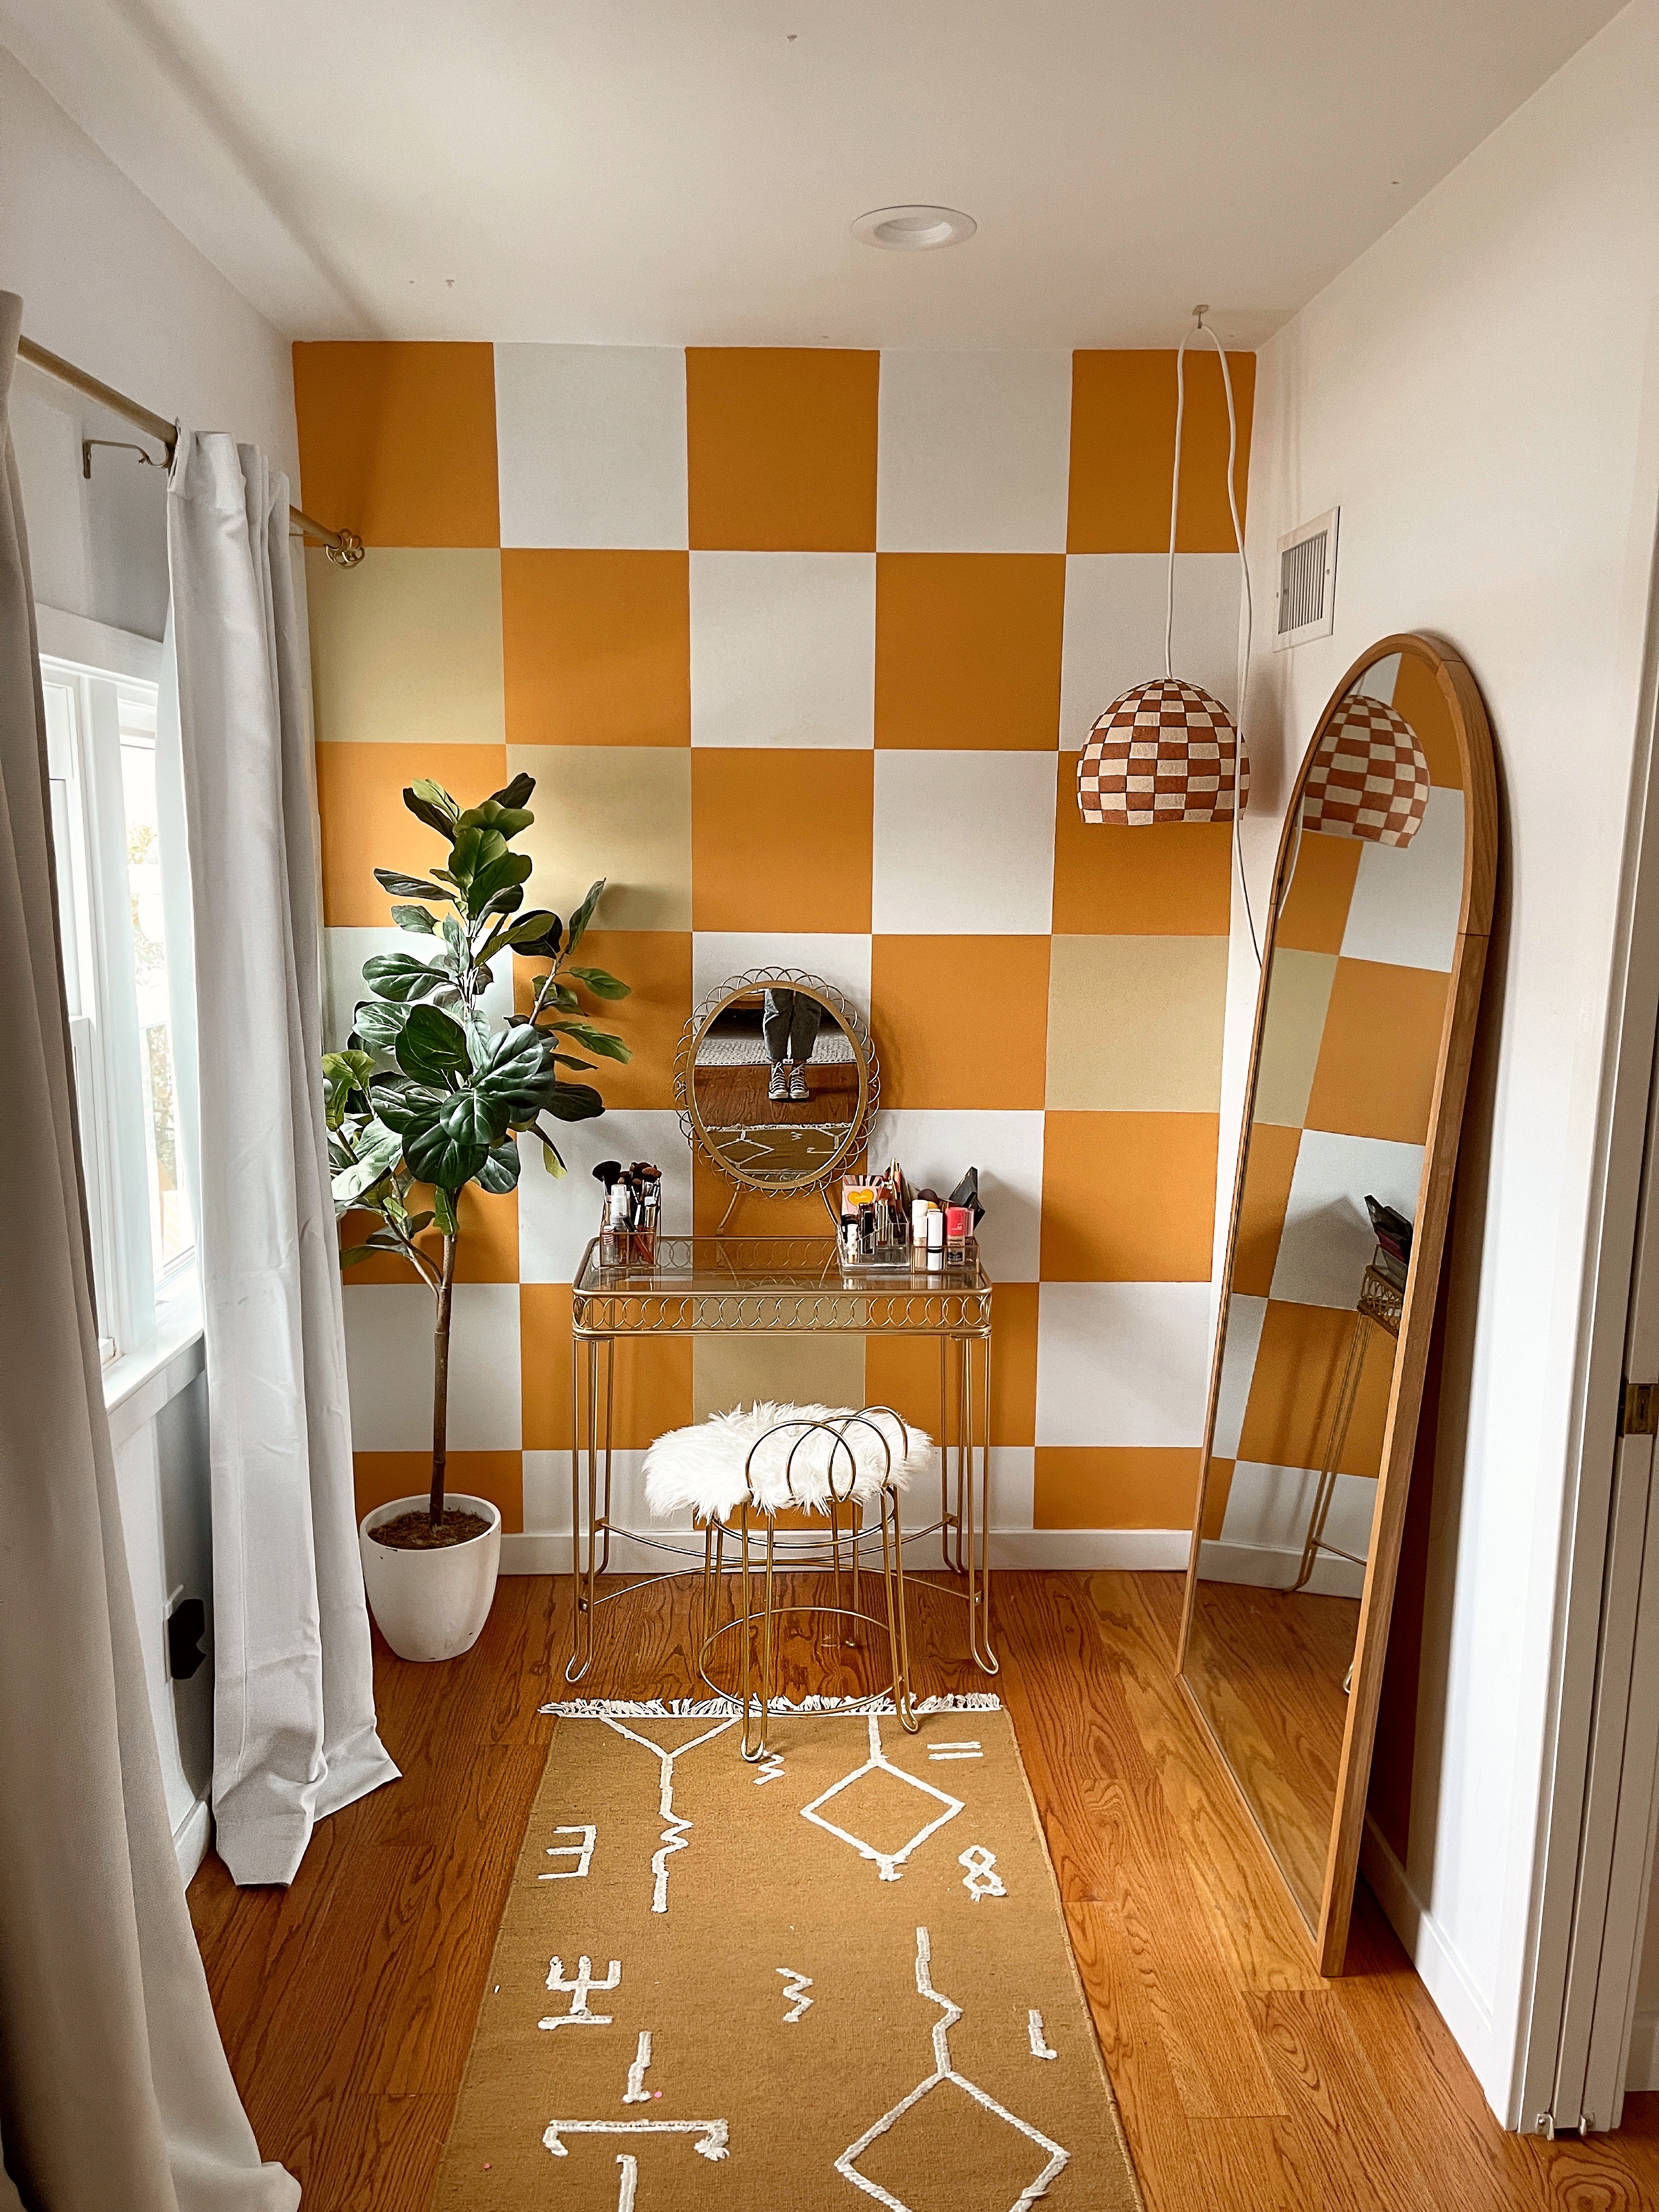
Hello and Happy Monday!!! I’ve been working on this post for a while, but life continued to get in the way – but I wanted to share a how-to on adding this big checked accent wall, since checkered pattern is so trendy right now! It is very doable, and you only need a few important tools!
What I needed:
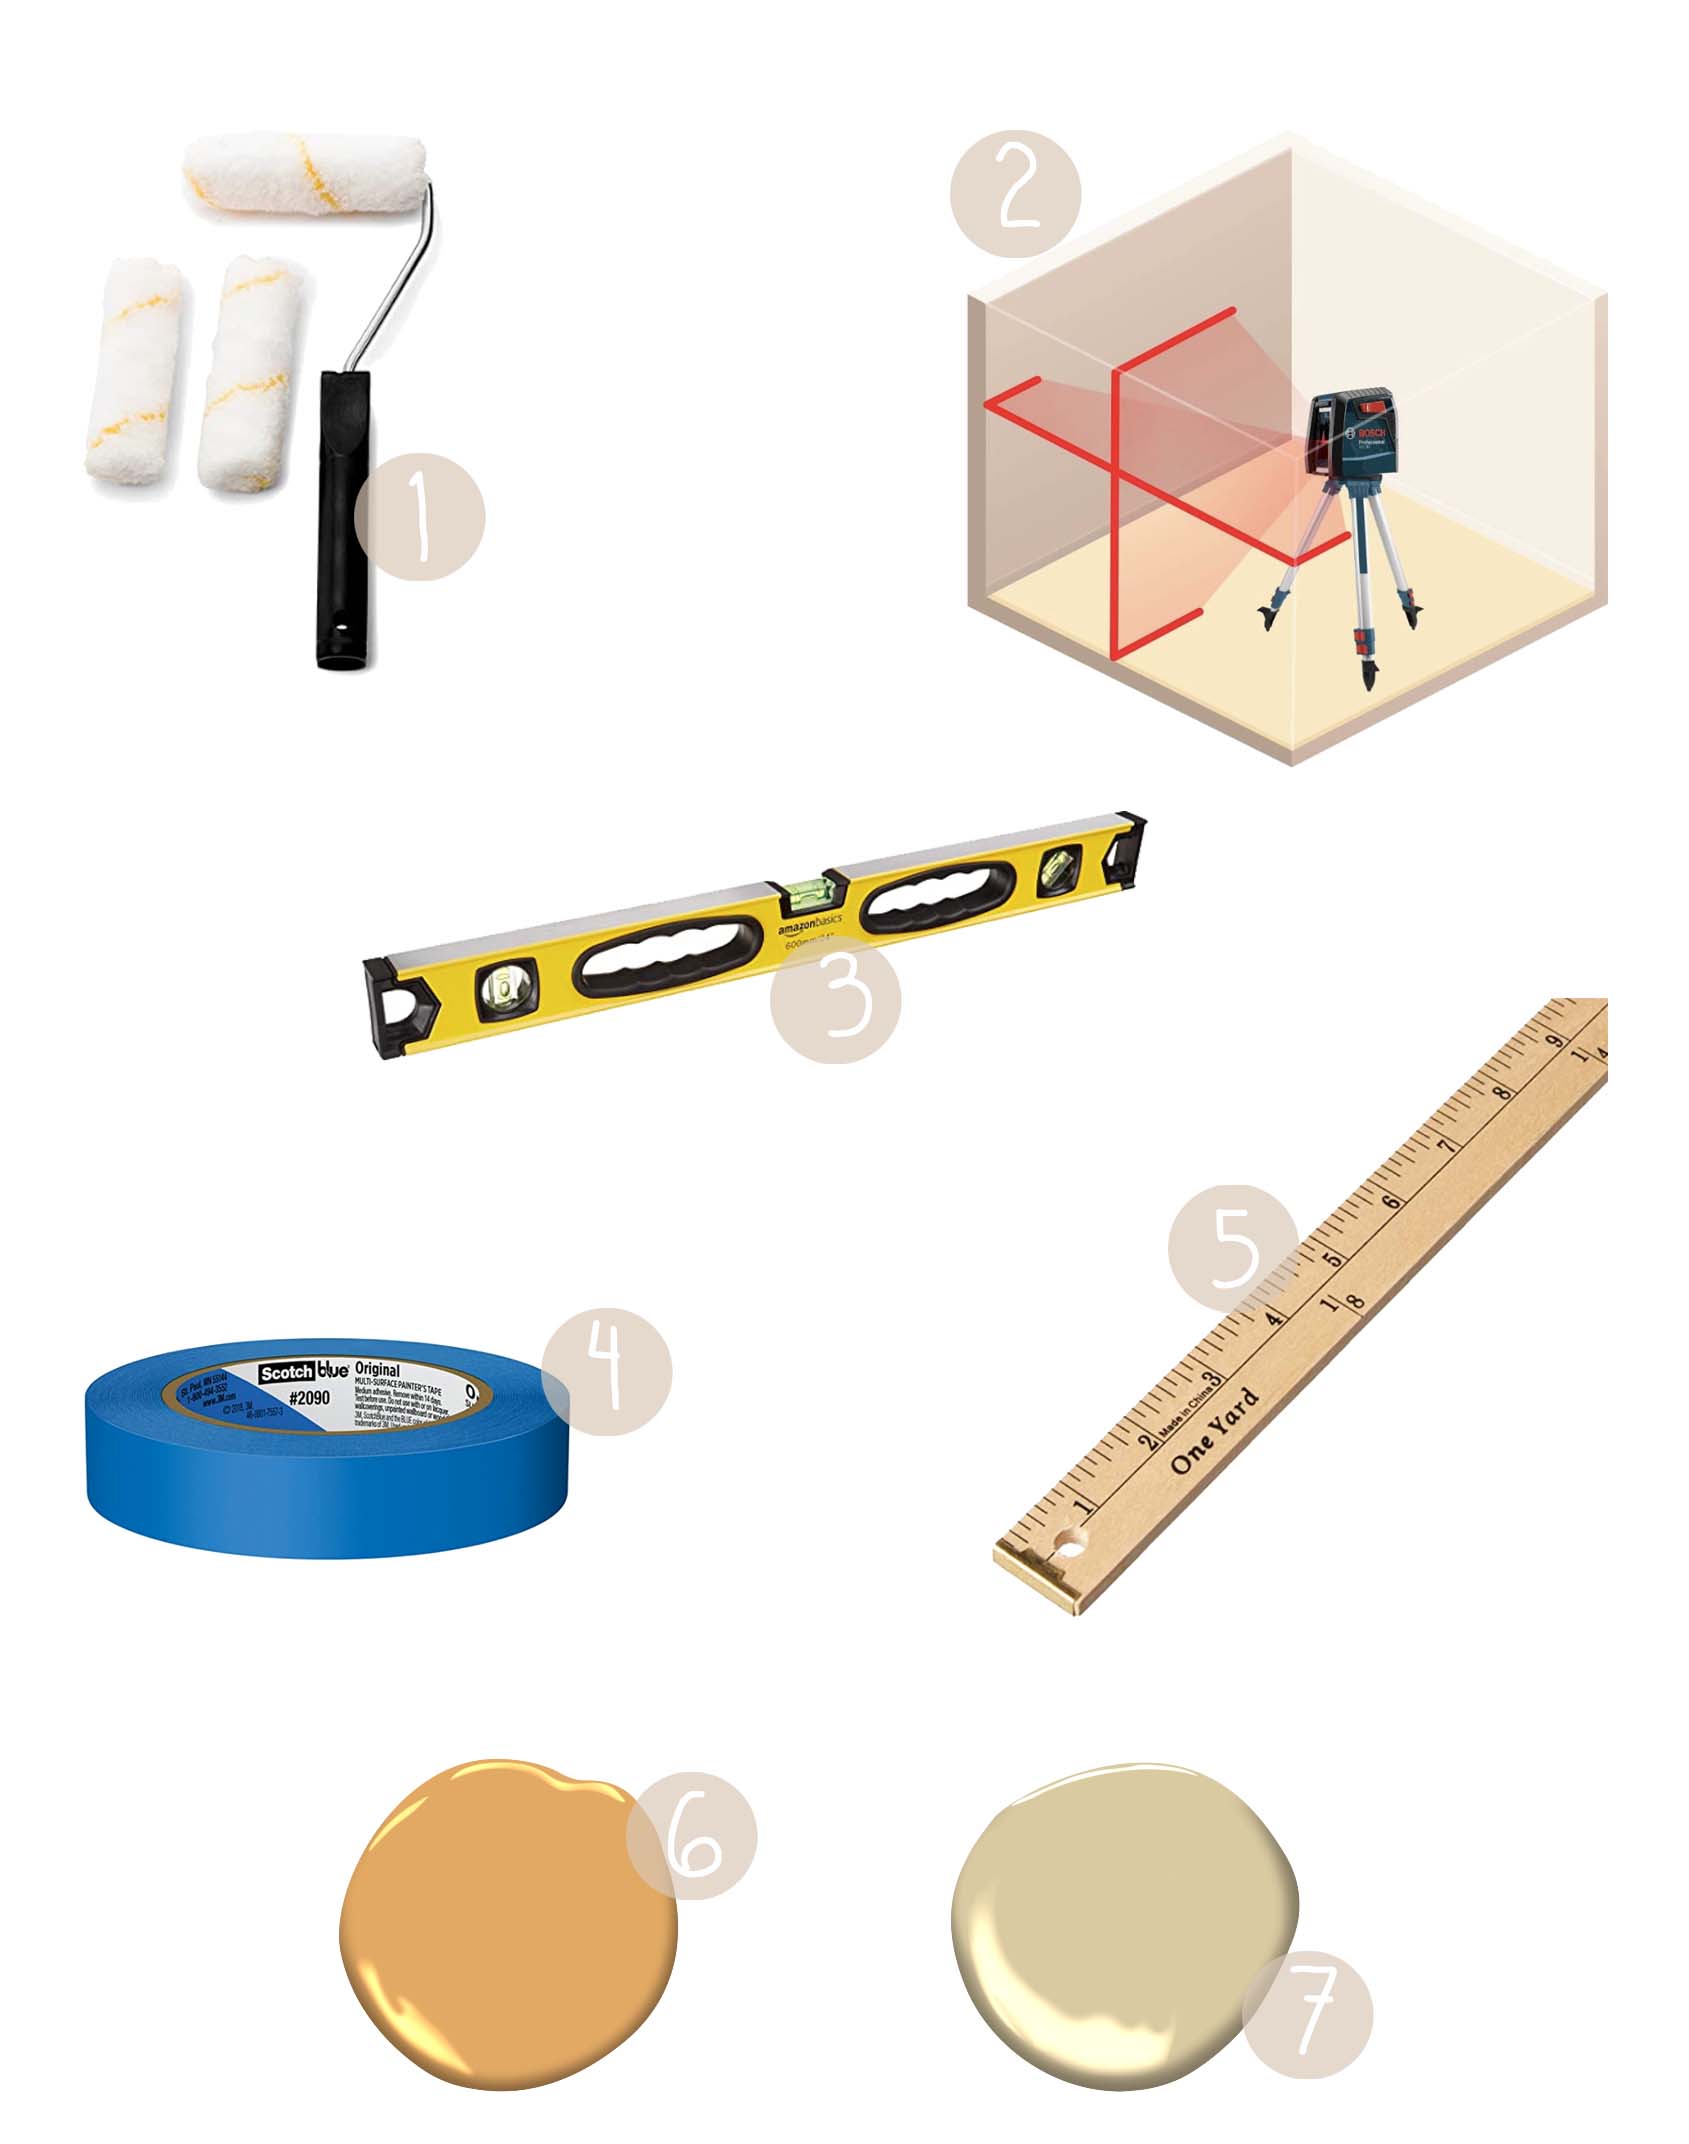
A laser level – I would say this isn’t necessary, but it made this project much much easier.
A ruler – I prefer these wood ones
a lot of blue tape!!
brushes and rollers
To start:
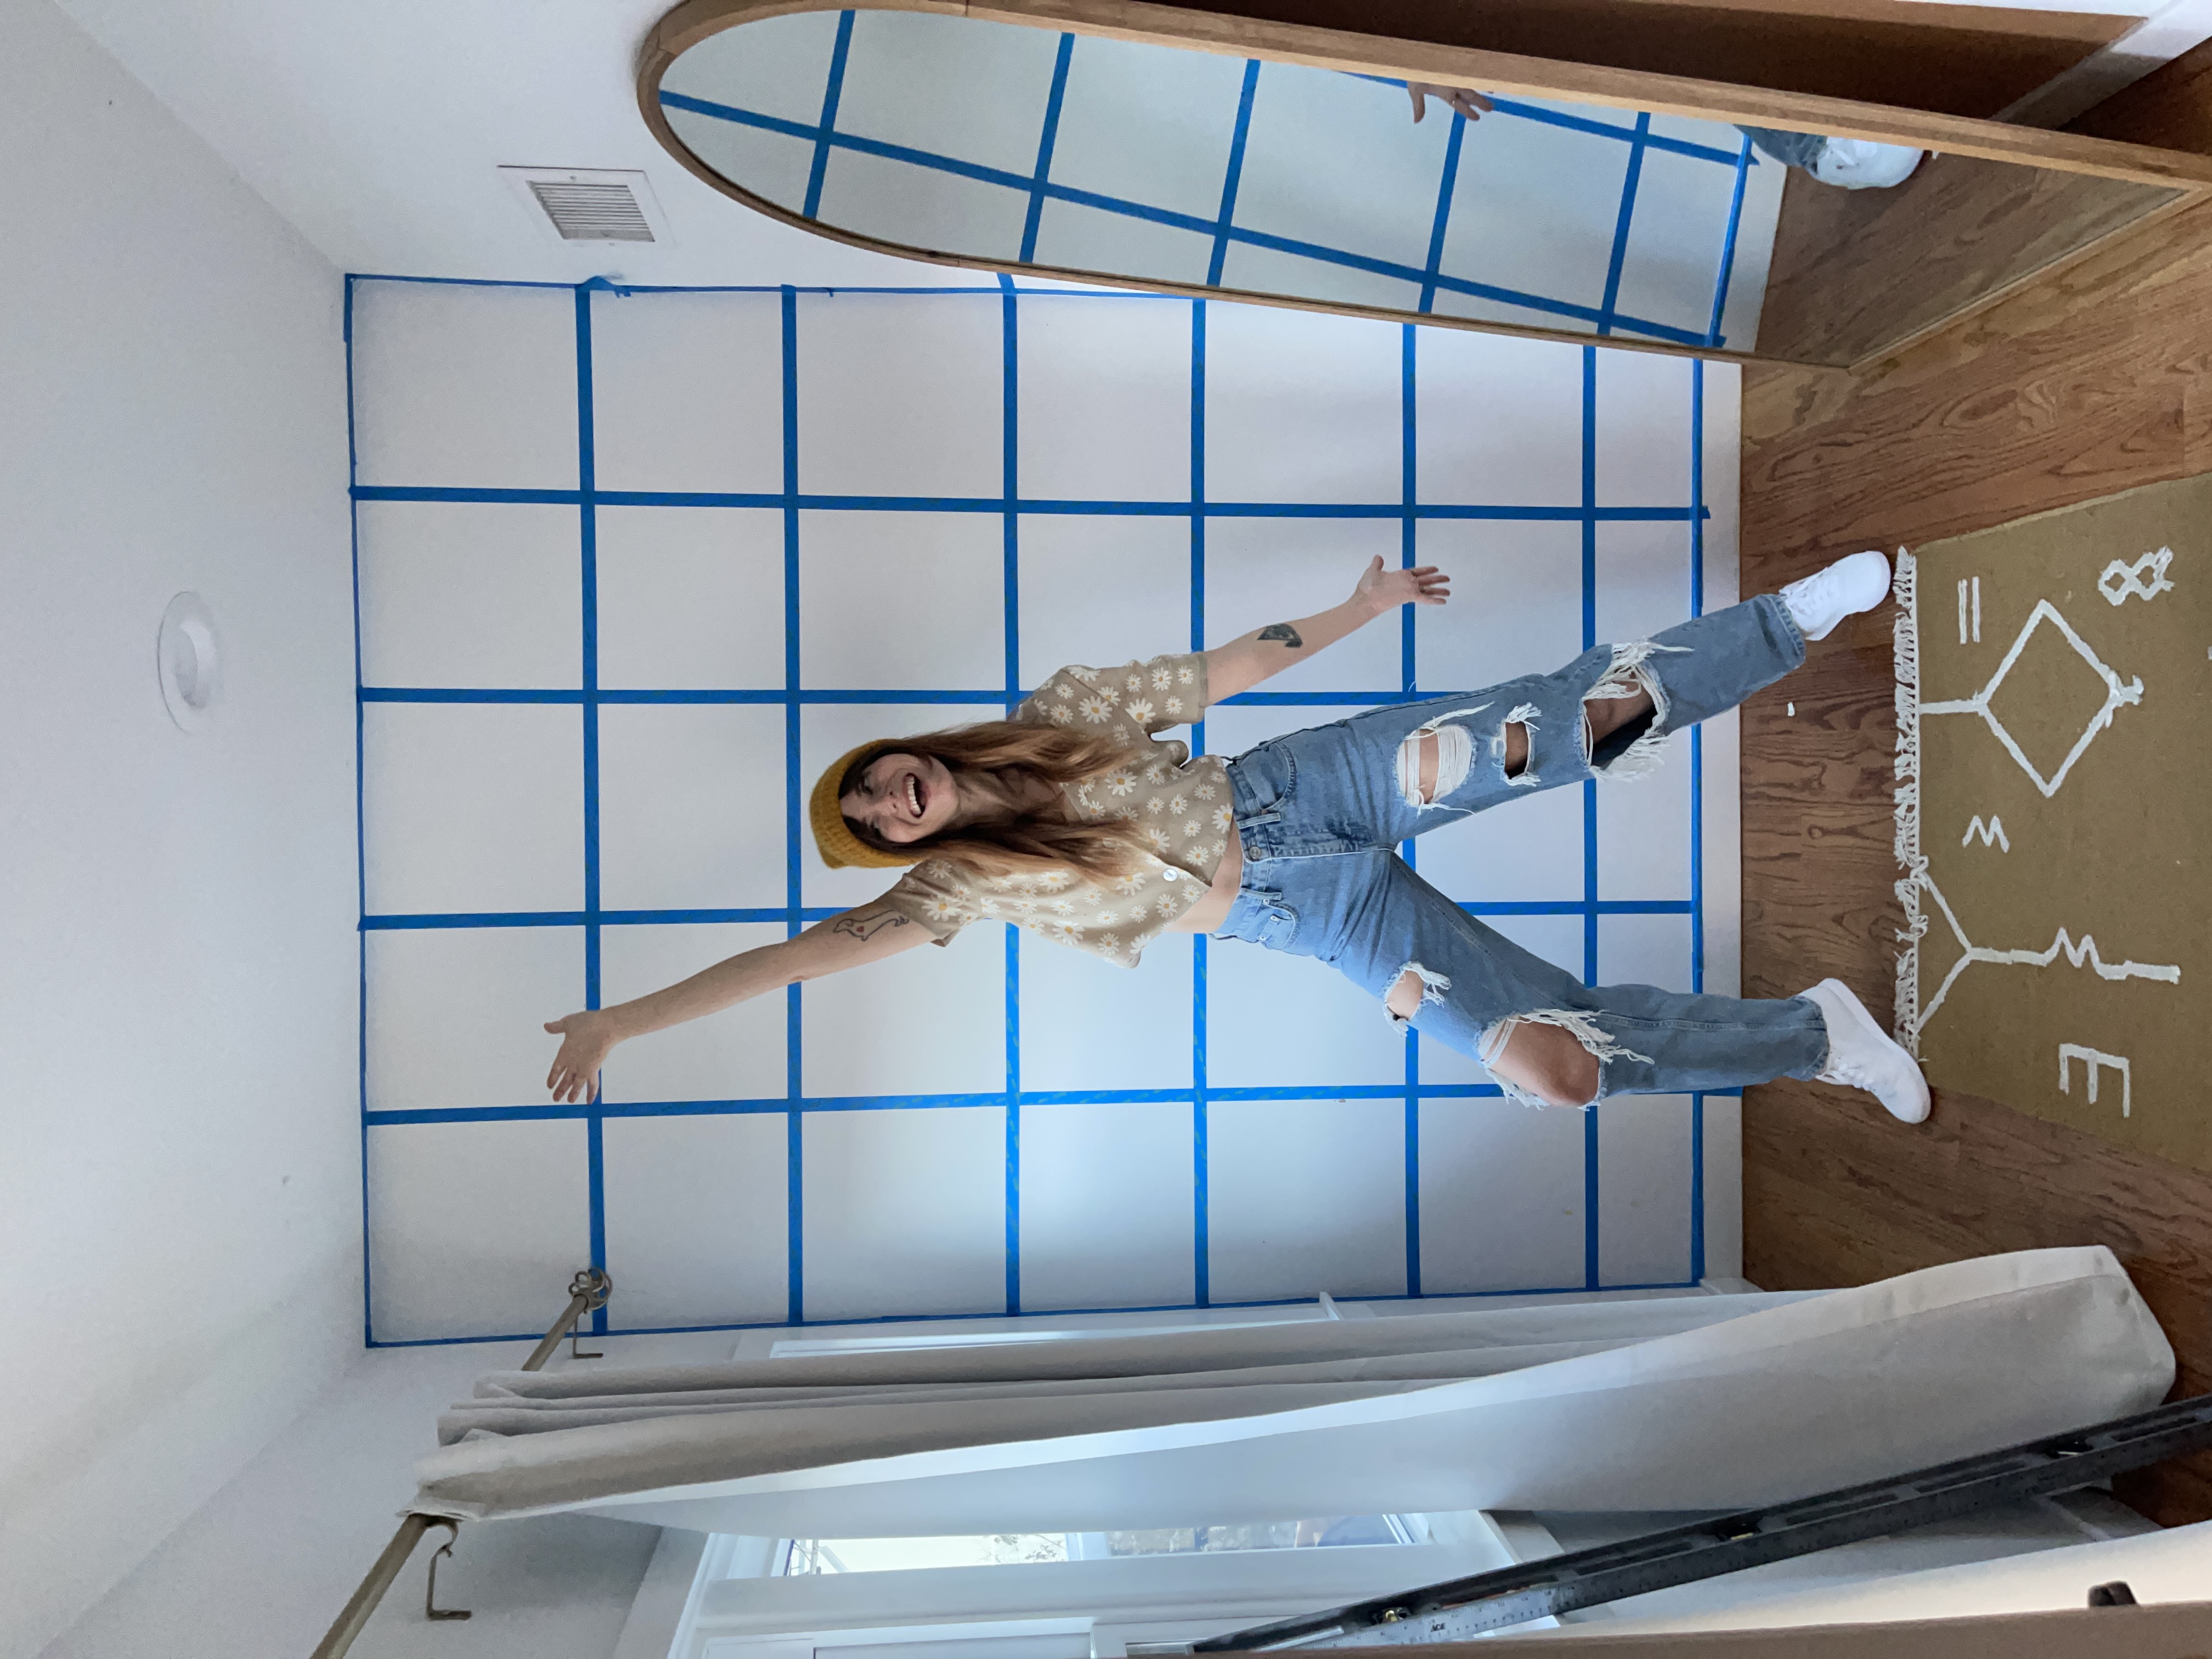
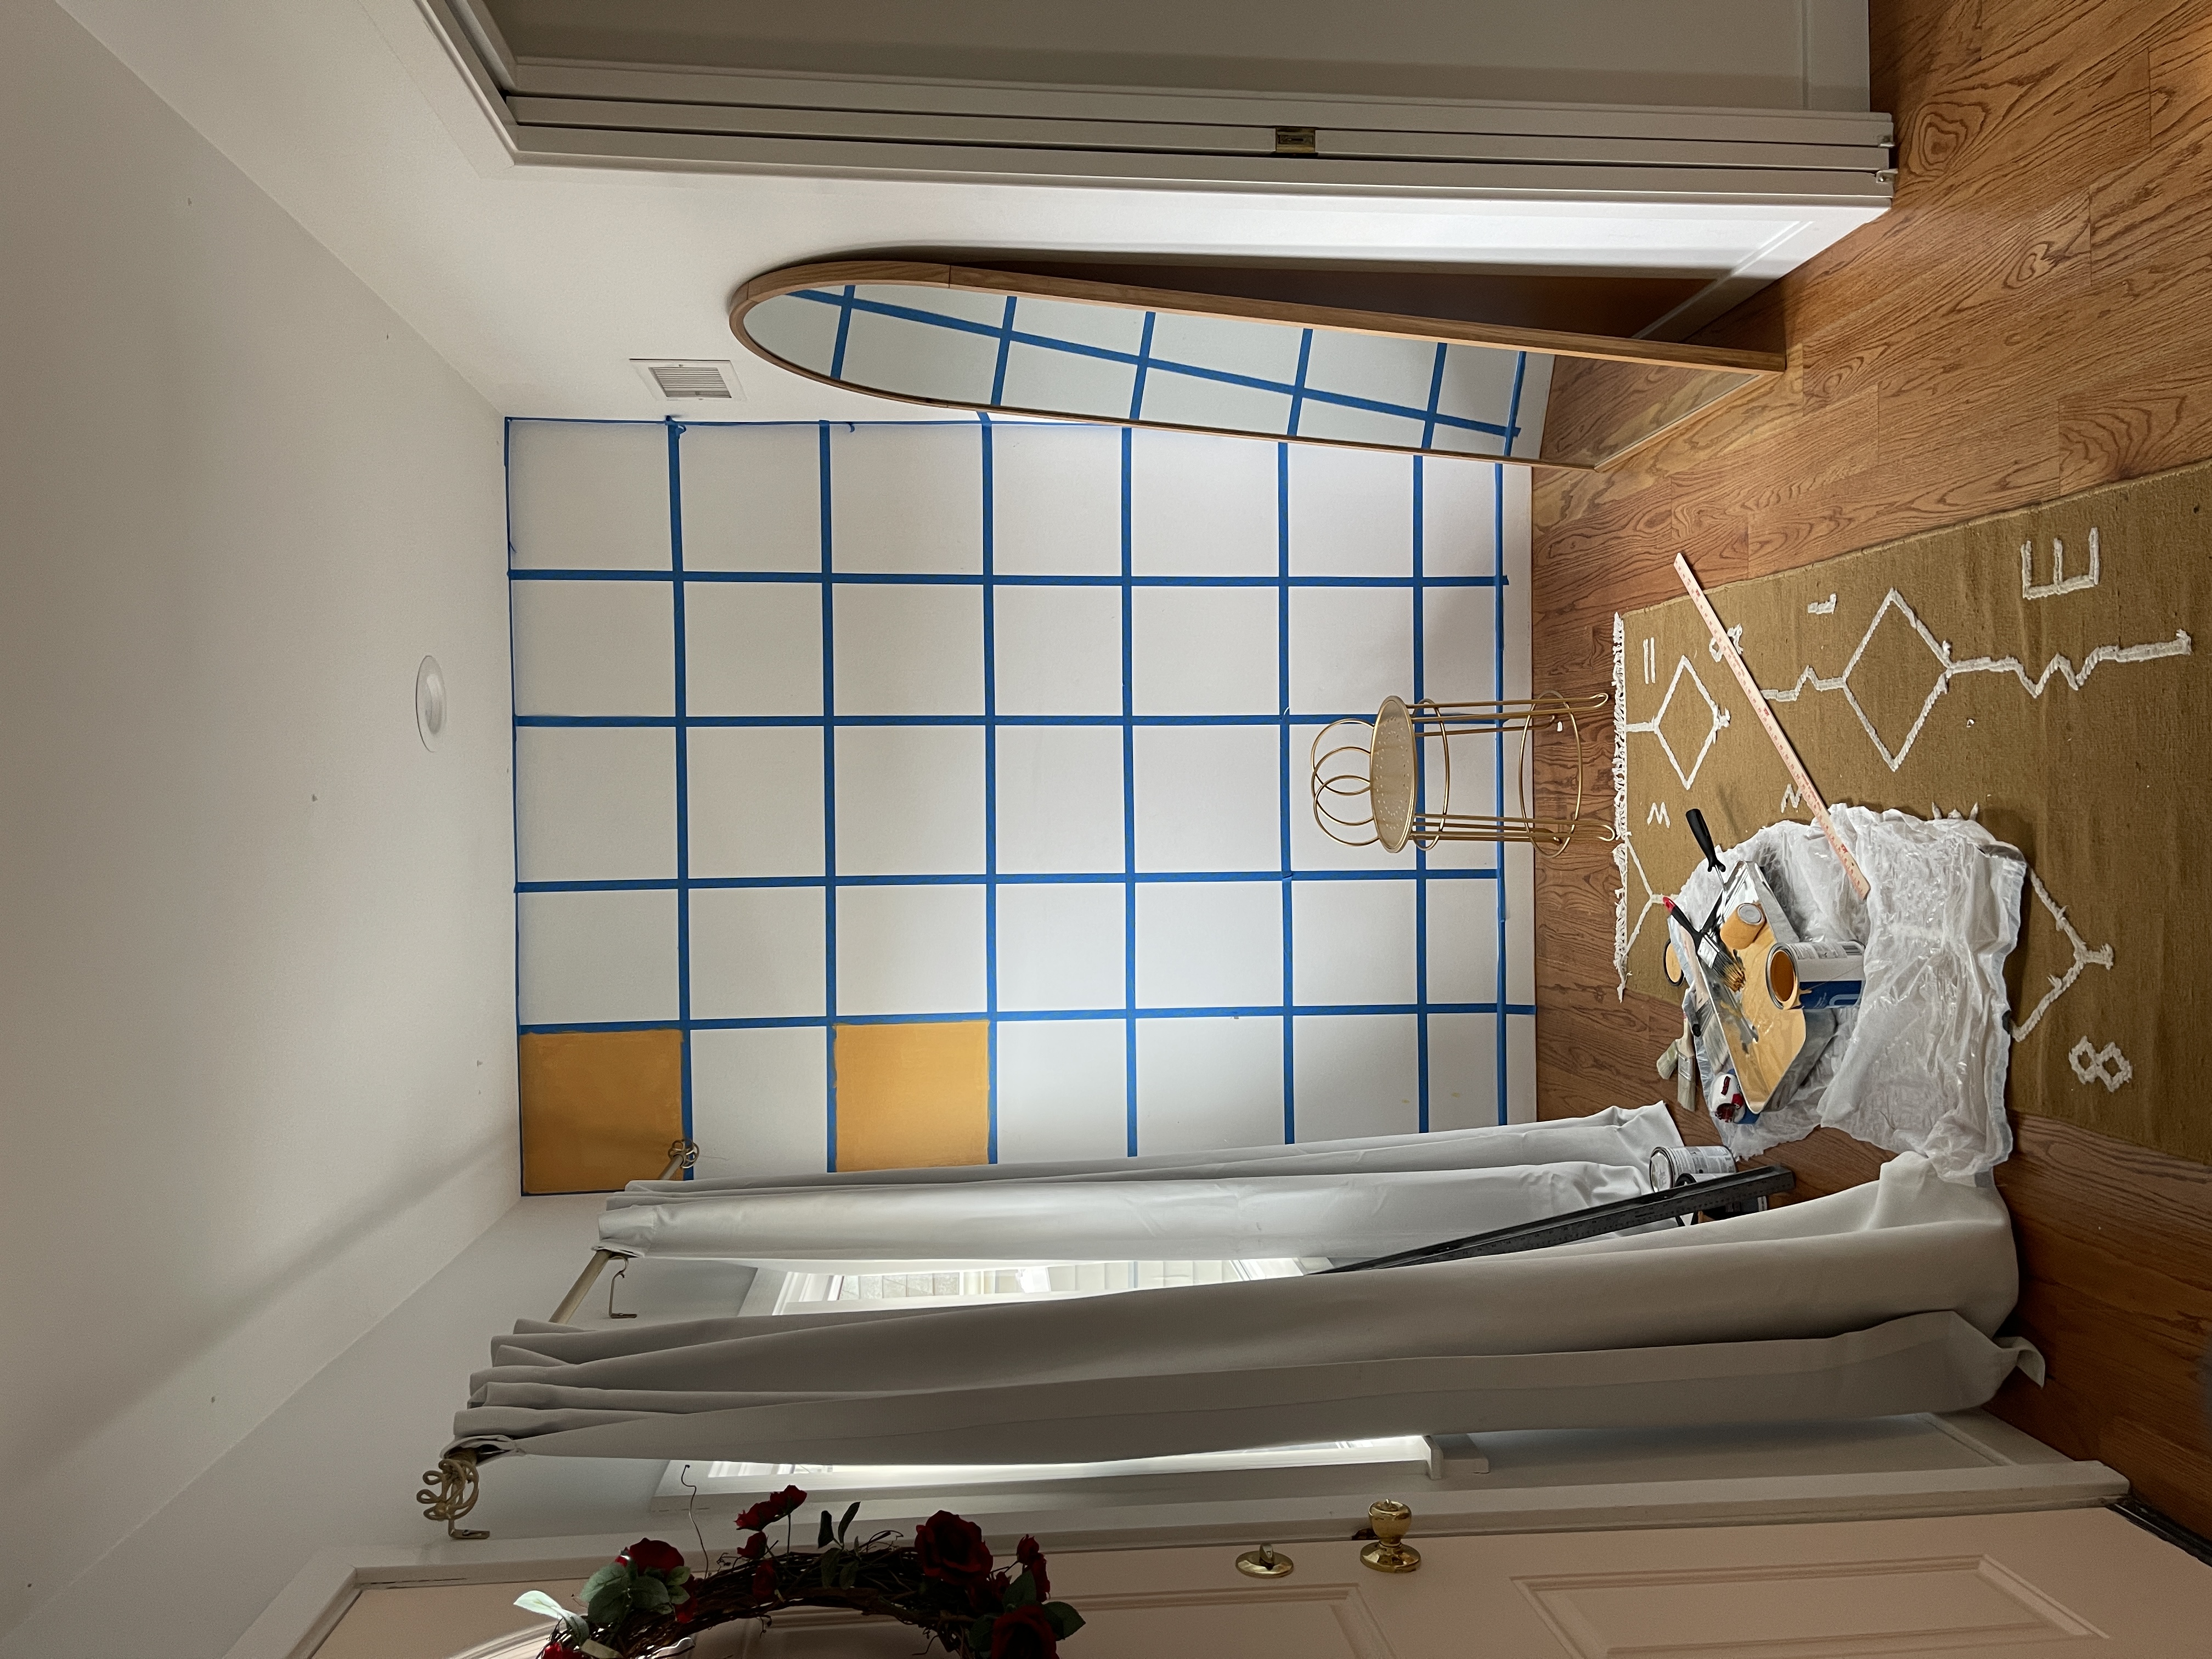
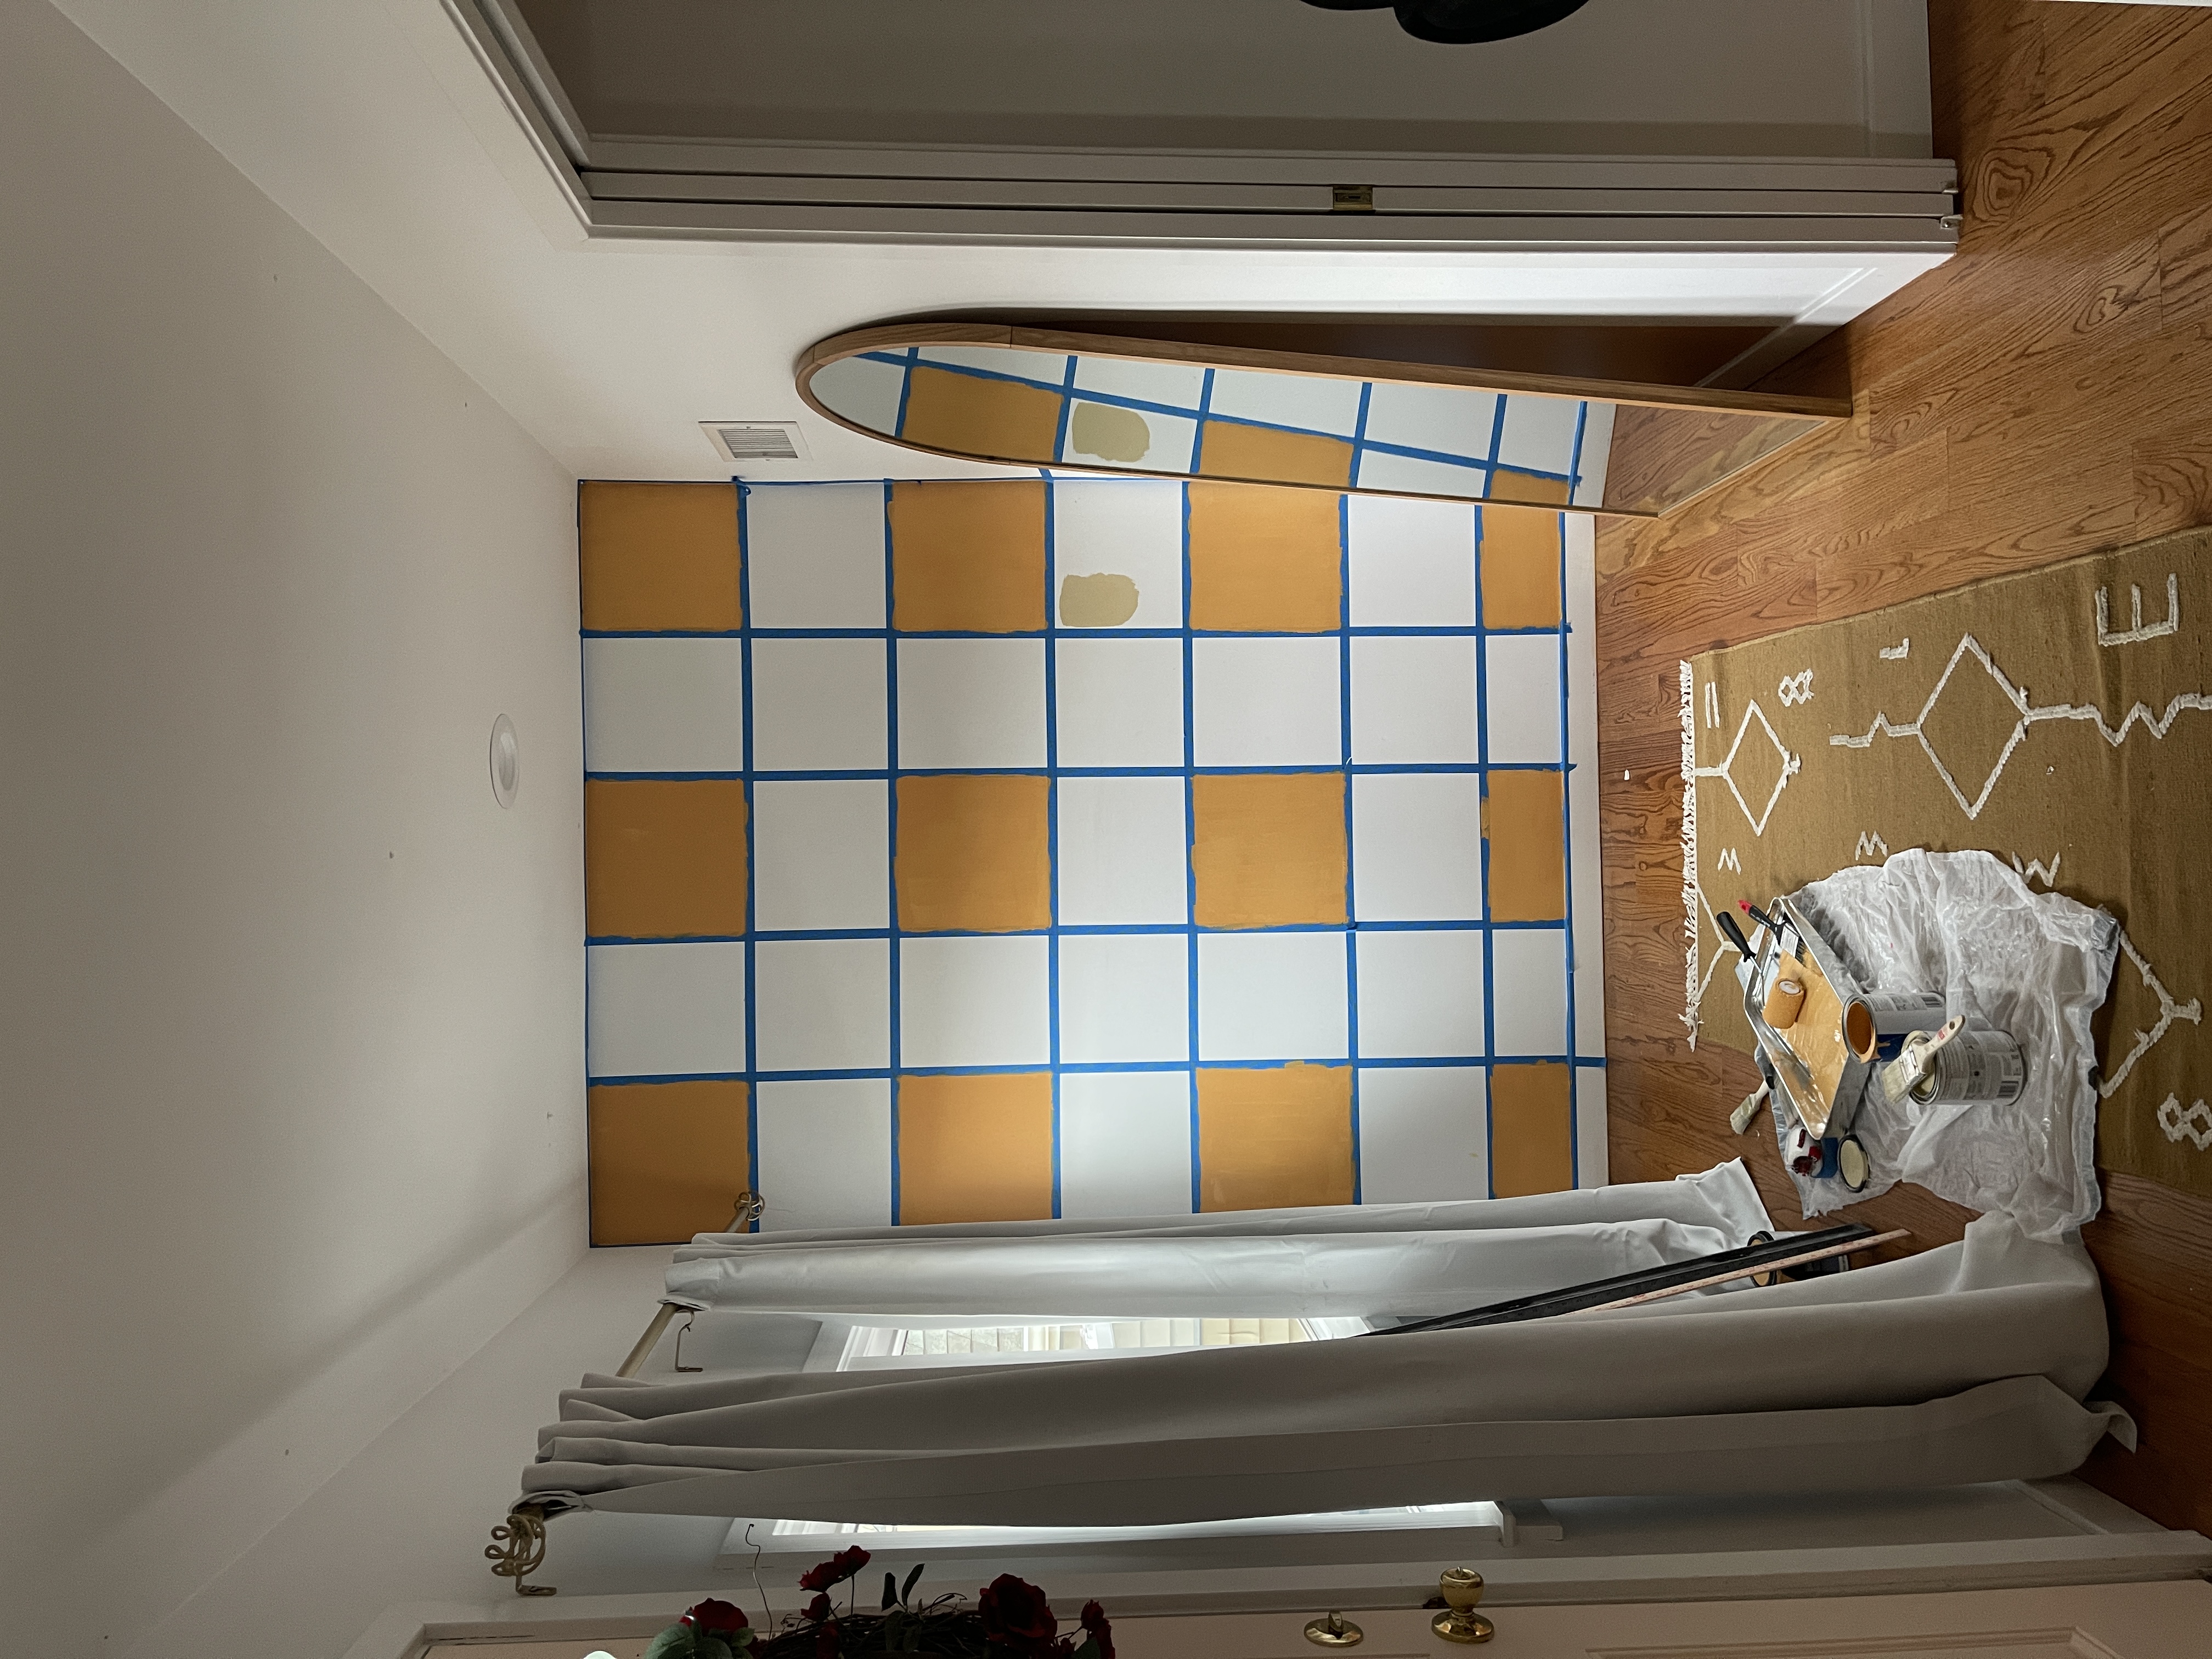
First I measured my wall size in full, and divided up the squares into the width that I wanted. I went with 14 X 14 inch squares. You then have to tape the squares – I started by taping horizontally, and then moved on to vertical. In order to tape things, you need to account for the TAPE SIZE into the full square size, so you will begin by creating rows 1, 3, and 5 the correct size, and then add the size of the tape into the width of rows 2 and 4. You will begin by painting every other row, while the in between rows will have tape covered part of the squares. Once you paint every other row, then you will go back in, and begin to shift tape around. Below is an example of what my wall looked like after I was done painting rows 1, 3 and 5 and ready to paint rows 2 and 4.
Once the paint is fully dry, you will peel it off, and connect corner to corner of the painted squares. You will basically be re-taping the outline of the new squares that you want to paint, It sounds very confusing, but I feel like when you are in the project, it does begin to make so much sense. Below is an image where you can sort of see what I mean – the accent color has been painted in between the newly painted squares!
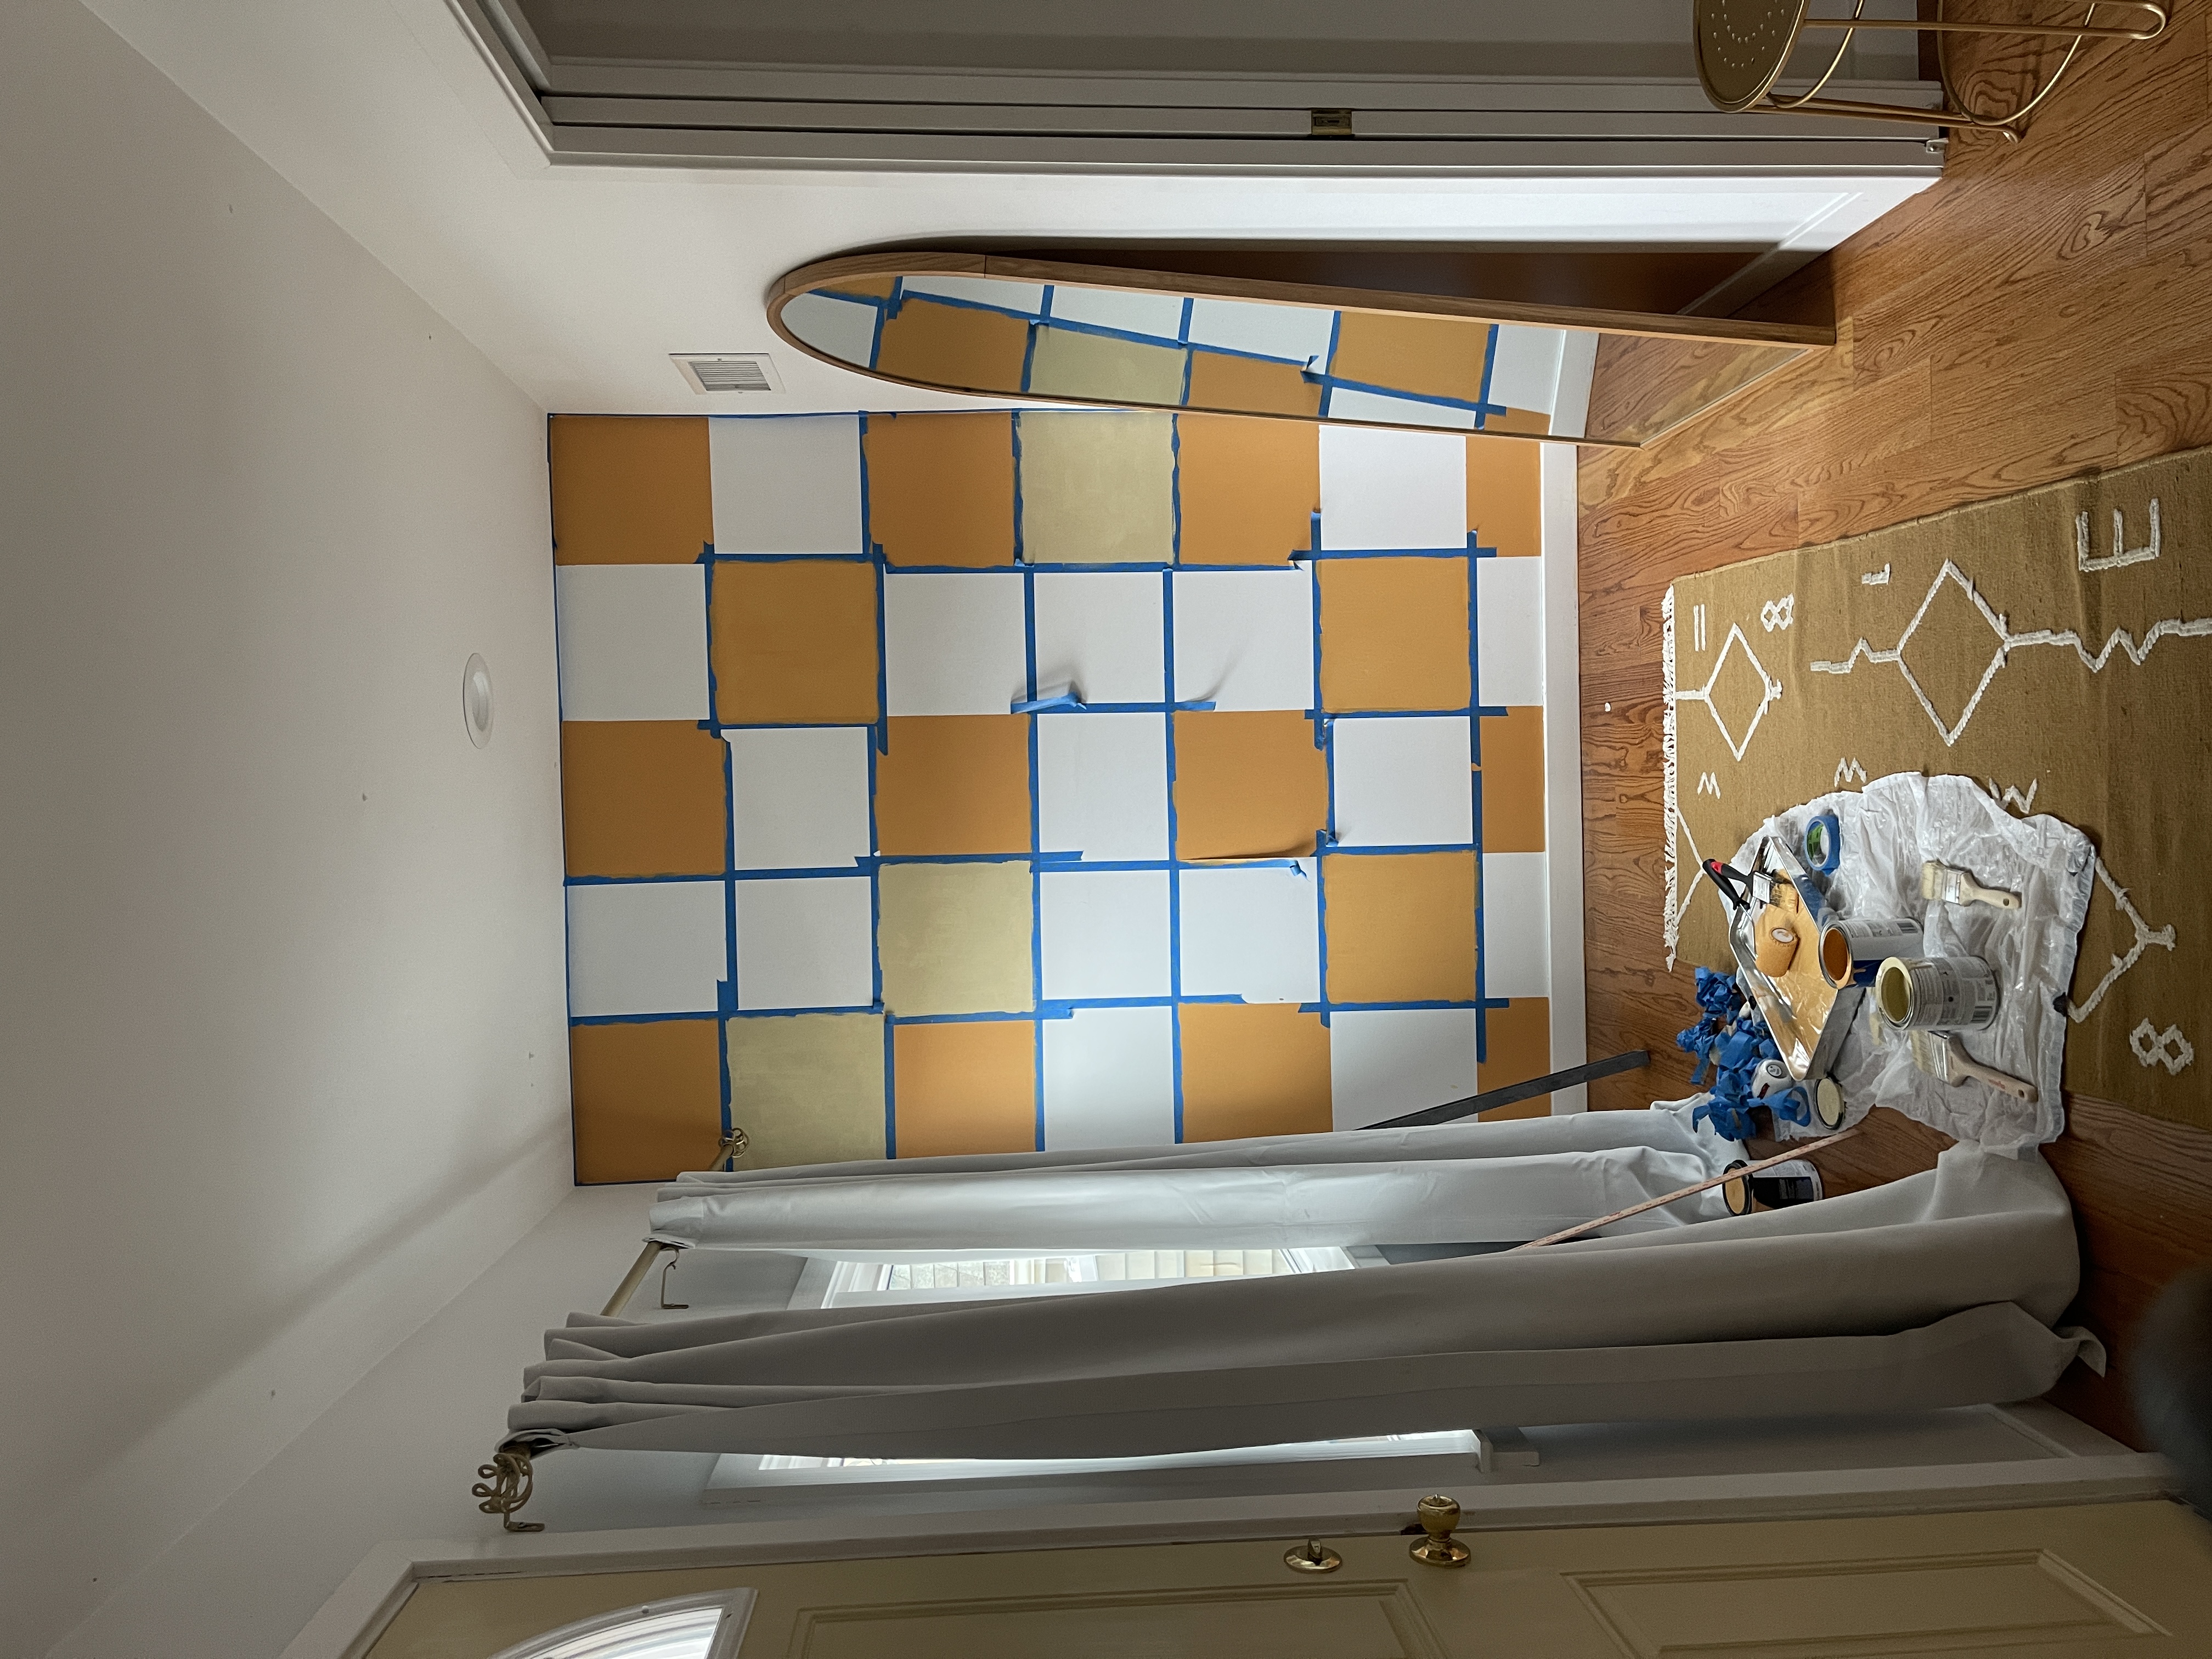
I decided to add in this accent color because I felt like it needed the extra dimension, and I was also inspired by @saraheartmann tutorial, and loved the lavender mixed with a second color. I hope this explains it for you, and if you have any additional questions just comment below!

